Apache Tutorial
Set up a Ubuntu/Apache cloud-based server
Apache Installation
_______________________________________________
Preparations
- Open your server text file.
- Open the PowerShell.
_______________________________________________
Update your working server text file
Add these lines to your server text file. Be sure to replace the IP and password where necessary.
######
ssh root@Your-IP
Your-Password
systemctl status sshd
######
systemctl status ufw.service
apt update
apt list -->upgradable
apt upgrade     --> Sometimes you will be asked if services need to be restarted.
--> I always select OK.
apt dist-upgrade
apt autoremove
###
###
###  INSTALL APACHE
###
###
apt install apache2 openssl
apache2ctl -v   --> version 2.4.52
systemctl status apache2
-->  Secure Apache
a2enmod ssl
a2enmod rewrite
systemctl restart apache2
service apache2 stop
###  prepare DNS
nano /etc/apache2/sites-enabled/000-default.conf
--> make these changes and save the file
       ServerAdmin webmaster@Your-Domain
       #DocumentRoot /var/www/html
       DocumentRoot /var/www
service apache2 restart
systemctl status apache2
-->  open apache ports!
ufw allow 'Apache Full'
-->  check it, and then
service apache2 stop
nano /etc/apache2/apache2.conf
--> Global configuration
apache2ctl -M
ServerName Your-IP
Timeout=60
<Directory />
        Options -Indexes +FollowSymLinks
        AllowOverride None
        Require all denied
</Directory>
<Directory /var/www/>
   Options -Indexes +FollowSymLinks
   AllowOverride None
   Require all granted
</Directory>
-->  save file
nano /etc/apache2/conf-enabled/security.conf
-->  ServerTokens OS to ServerTokens Prod
-->  ServerSignature On to ServerSignature Off
systemctl restart apache2
systemctl status apache2
-->  remove html folder from /www
###  -->  service --status-all  -->  shows all services
###  -->  SNAPSHOT RR-wtf-APACHE
reboot  --> use console wait for login before ssh
After you have made the changes, save the file and let's go!
_______________________________________________
Check some server things
Login to your Ubuntu server with PowerShell. Then take a look at who is there.
systemctl status sshdCheck the firewall status. Remember, green is good:
systemctl status ufw.service_______________________________________________
Update your Ubuntu server files
Go through the update sequence. Zero change is OK. Follow the commands below.
apt updateRecently, apt update has been deprecated. This means it will work right now but will not some time in the future. I will tell you how to bypass this warning later on in the Domain Optimization section of the tutorial.
apt list --upgradableapt upgradeapt dist-upgradeapt autoremove_______________________________________________
A D V E R T I S E M E N T
_______________________________________________
Install Apache2 / OpenSSL
Finally! This installs Apache2 and OpenSSL. The Apache HTTP Server is a free and open-source cross-platform web server software. OpenSSL is a software library for applications that secure communications over computer networks against eavesdropping or the need to identify the party at the other end. It is widely used by Internet servers, including the majority of HTTPS websites.
apt install apache2 opensslAnswer 'Y' to proceed. Watch all the lines fly by! Then check the version. Update the version line in your server text file. Check Apache2 status. Remember, 'q' quits the listing.
apache2ctl -vsystemctl status apache2The following commands enable strong cryptography via Secure Sockets Layer (SSL) and Transport Layer Security (TLS) for Apache2. The second command allows Apache2 to map an URL to a filesystem path, like the www path. Do both of them before the restart command.
a2enmod ssla2enmod rewritesystemctl restart apache2Go ahead and stop the Apache2 service for now.
service apache2 stopNext, we will pause a bit to set up your account at Namecheap. We need to do this to obtain a domain name to use on your Apache2 web server.
_______________________________________________
Namecheap Domain Name
What's a domain name? What's an URL? A domain name is the name of the website. An URL, or Uniform Resource Locator is a complete web address for a web page.
This is a domain: major.tools -or- biggestwebsurfer.comThis is an URL: https://major.toolsIt's time to obtain a website domain name from Namecheap. You can use any one you may already have, but if you need a new one, I recommend Namecheap. I know how to set up the DNS (Domain Name System) data on their service, so I can save you some trouble learning the ropes there. Click on the link below to get started. Refer back here for answers as you set up Your-Domain name. Click on the image below to get started.

Search for a domain name you would like to have. Whatever you decide on, you don't actually ever own the name, you just rent it for a year at a time. That's how this works. The domain name can be anything, for example biggestwebsurfer.com or major.tools. Those were actually available the first time I did a search! The idea is to make one up that is easy to remember and as short as possible. It's always best to try to find a domain name that closely relates to what you will be using the website for. You will see that almost all really good names or short domain names are gone. So do your best, make one up, and enter it into the Namecheap search bar.
You have probably wondered about the Top Level Domain, or TLD. This is the extension at the end of your domain name. Your-Domain includes the TLD. An example would be example.com - the .com is the TLD.
Did you find one? Great! Add it to the cart. You do not need anything else at this time. Now, view the cart.
Everything should be preset. It should be like this:
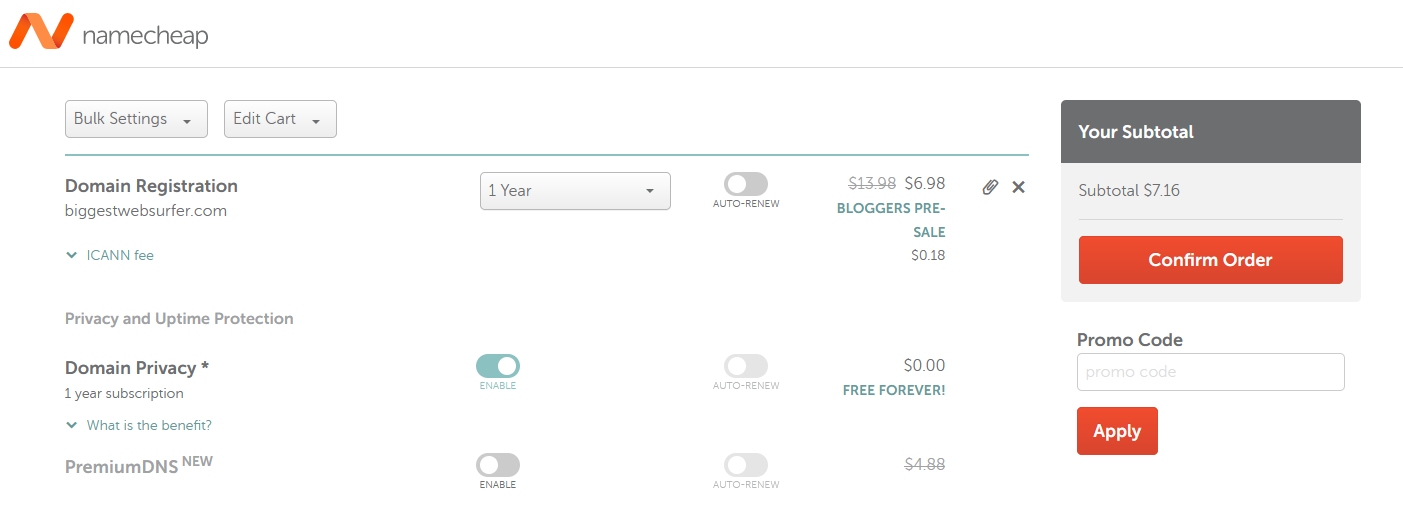
Next, confirm the order and you will be presented with a Create An Account option. Finish this, and come back here to continue.
DNS Configuration
Log in to Namecheap. You should see Your-Domain, the domain you created but if you don't, select Domain List from the left menu. Click on MANAGE. Then select Advanced DNS.
Click inside the Value of the CNAME Record and substitute Your-Domain for 'parkingpage.namecheap.com'. It should only be the domain name, like biggestwebsurfer.com.
Delete the 'URL Redirect Record' by pressing the trash can icon for that line.
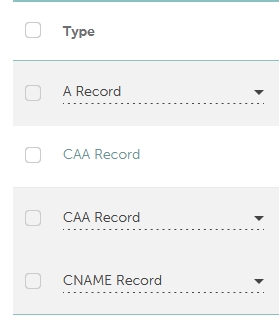
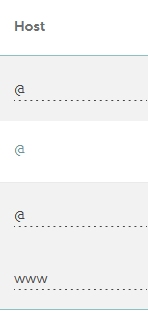
Click the ADD NEW RECORD button. You are going to make the HOST RECORDS look like this:
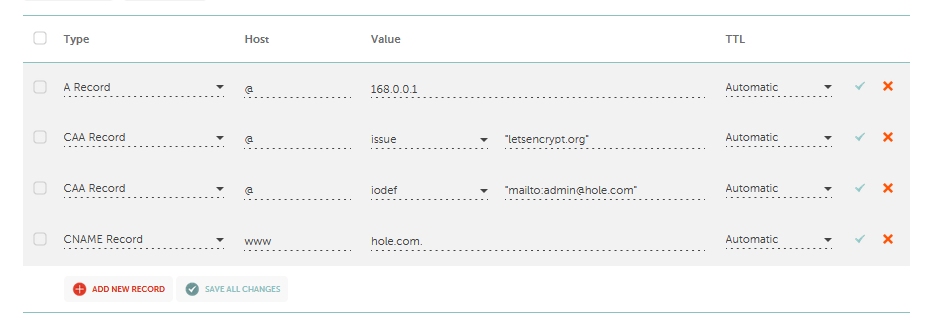
After you click ADD NEW RECORD, select A Record and fill it in to make it look like the example. Remember to use Your-IP. Continue doing the two CAA Record lines, but use Your-Domain where the email domain is and letsencrypt.org in the other record. Here are some enlarged pics of the columns in this example:

''letsencrpyt.org'' and ''mailto:admin@major.tools'' are surrounded by double-quotes.

When you are satisfied with the input, click SAVE ALL CHANGES and log out of Namecheap.
_______________________________________________
A D V E R T I S E M E N T
_______________________________________________
Continue the Apache2 Installation
Edit the Apache2 sites default configuration file:
nano /etc/apache2/sites-enabled/000-default.confIf you will have multiple domains, pick the one that you want to be the basic one for the ServerAdmin email address. Otherwise, remember to use Your-Domain.
We are eliminating the html directory as a default for our www files. You will see more about this later. Make these changes:
ServerAdmin webmaster@Your-Domain
#DocumentRoot /var/www/html
DocumentRoot /var/www
Save the file.
service apache2 restartsystemctl status apache2If everything is working properly, your Apache2 server is running and green. Remember to press q when you see the END after a status. This takes you back to root.
It's time to open the Apache ports in the firewall and see if a web page is available online.
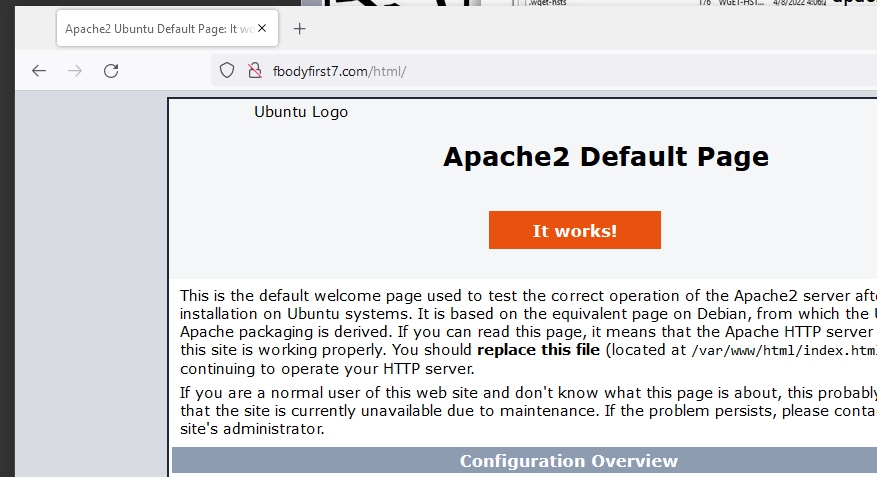
ufw allow 'Apache Full'Open a Nightly page. Enter https://Your-Domain/html
If you see the Apache2 page, you are doing great! If you did not, carefully retype the entry or verify the Namecheap data is correct.
Next, try entering https://Your-IP/html
Again, you will see the Apache2 page.
_______________________________________________
A D V E R T I S E M E N T
_______________________________________________
Apache2 Configuration
It's time to do some more work to the Apache2 server.
service apache2 stopThe Apache2 web server does not know what the Fully Qualified Domain Name(FQDN) is for your website. It generates some non-important but bothersome error messages in your Apache server log. We will help the server and eliminate the error messages. First, look at the error message:
apache2ctl -MSee the message:
AH00558: apache2: Could not reliably determine the server's fully qualified domain name, using 127.0.1.1. Set the 'ServerName' directive globally to suppress this message
We will fix it.
Open the Apache2 configuartion file:
nano /etc/apache2/apache2.confFind: (Ctrl W)
# Global configuration
#
After it add the following line:
ServerName Your-IPNow, make a few more changes to the file.
Change the timeout to a lower value:
Timeout=60Make these changes near the end of the file:
<Directory>
        Options -Indexes +FollowSymLinks
        AllowOverride None
        Require all denied
</Directory>
<Directory /var/www/>
   Options -Indexes +FollowSymLinks
   AllowOverride None
   Require all granted
</Directory>
Save the file. Ctrl X, Y, Enter.
Add some security enhancements:
nano /etc/apache2/conf-enabled/security.confMake these changes:
#ServerTokens OS
ServerTokens Prod
#ServerSignature On
ServerSignature OffSave the file. Ctrl X, Y, Enter.
Restart the Apache2 server.
systemctl restart apache2systemctl status apache2OK! Take another look at Your-Domain/html in Nightly. Looks OK, right? Well, it may look a little different, but it is the same Apache2 Default Page.
Now remove /html from Your-Domain so it looks like https://Your-Domain. Forbidden? This is good. We have tightened up the screws on the Apache2 server security. One thing changed is that you cannot index a directory to see it's contents. Another thing changed is there is no server identification on the page.
We are ready to install PHP...etc. But first, let's use FileZilla to clean up the www folder and see what's there.
_______________________________________________
A D V E R T I S E M E N T
_______________________________________________
Working with FileZilla
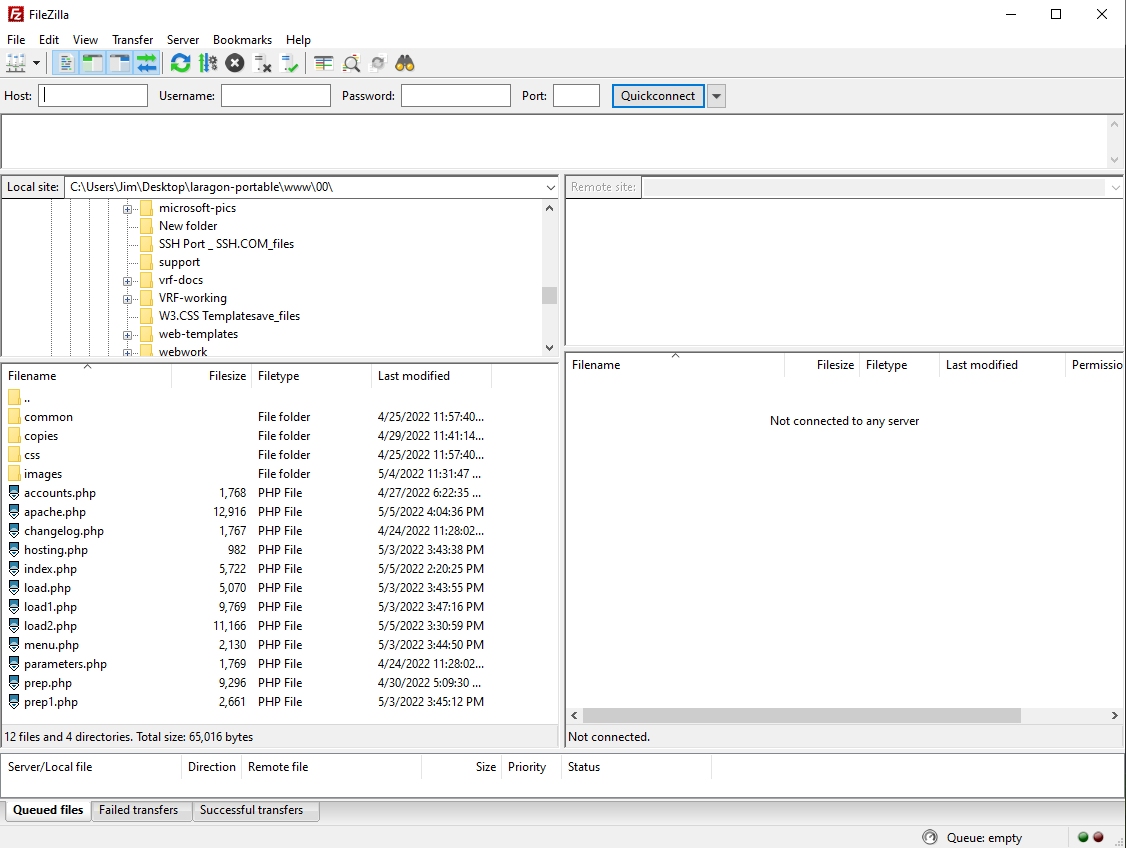
Open FileZilla. You will see this screen:
Click just on the servers icon under the File tab. It will open a window:
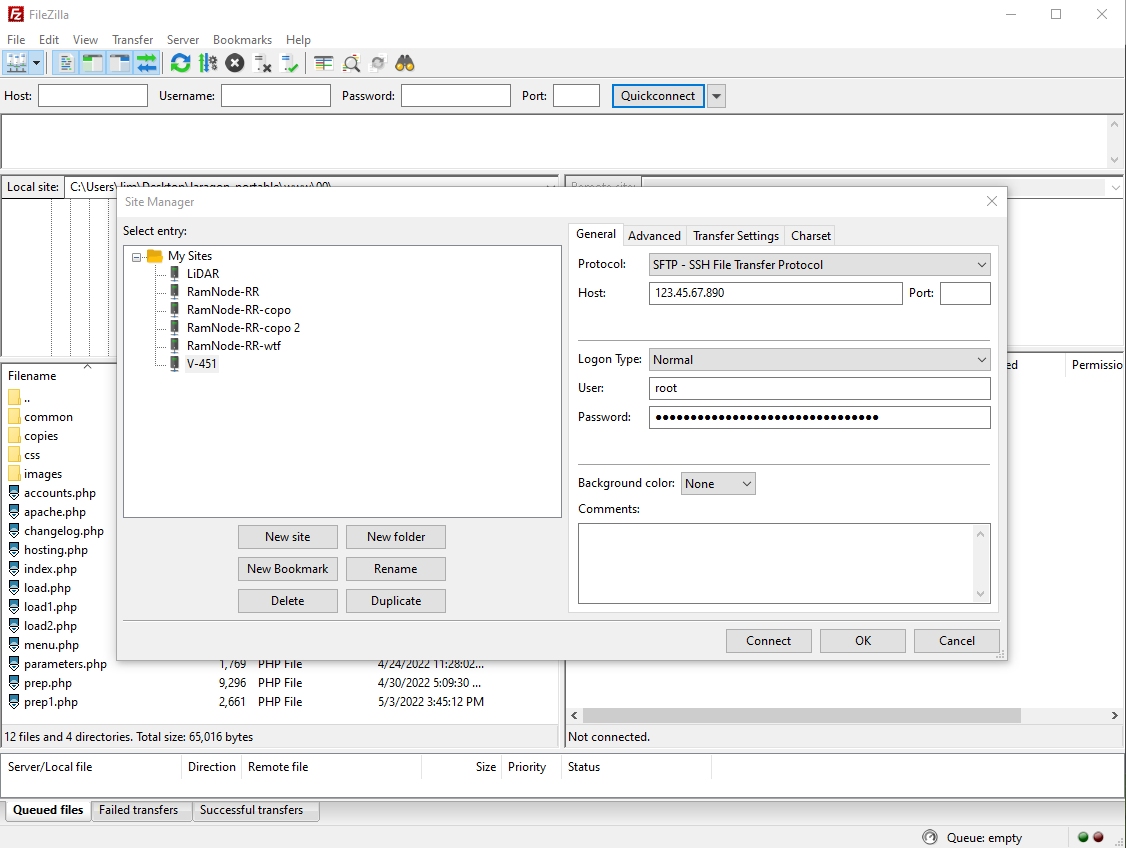
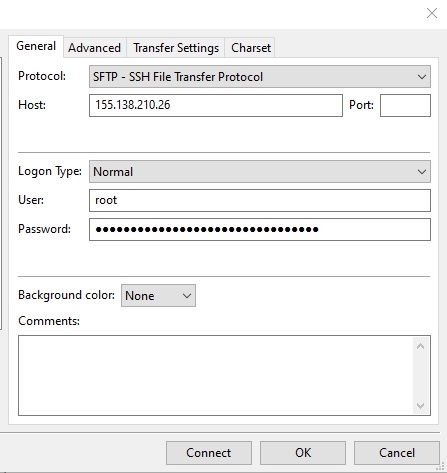
Click New site. Make up a name, like V-123. Fill in the right half like the following but substitute Your-IP and Your-Password and click OK. The window disappears.
Go back to the top of the FileZilla window and select the little down arrow under the File tab. You should see your new connection. Click it. You'll be asked if you trust this connection. Check Always. You will see the Remote site: window change to this:
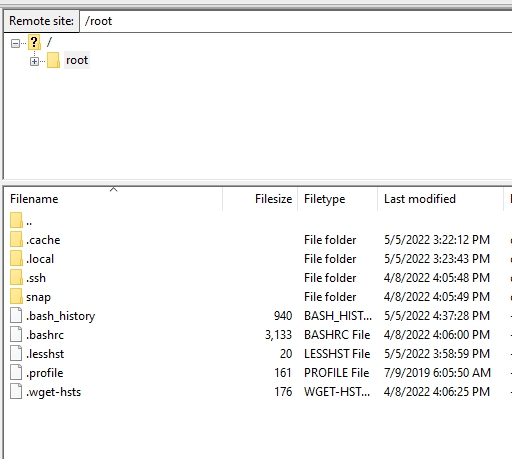
You are on your Ubuntu server at the root level! Click the minus sign at the top twice. All of your file folders for your server are there. Scroll down and double-click the var folder. Scroll down some more and there is what we seek, the www folder!
Open the www folder and you will see the html folder. Open it and you will see index.html, the Apache2 created web file.
The www folder represents the HTML level of your Apache2 web server. Anything in that folder that can be operated on at the html level will display in your browser window. Let's do a simple test to make this clearer.
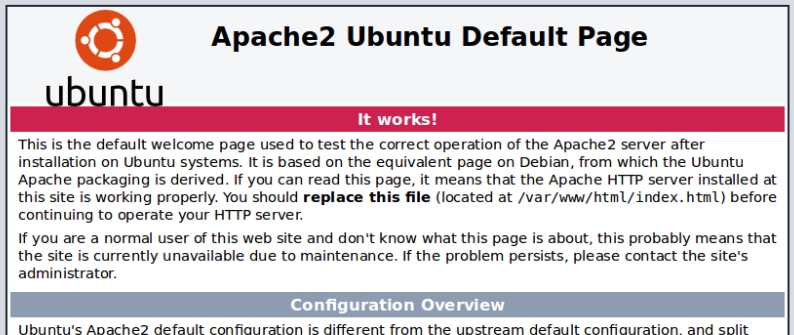
This should be familiar. Open a Nightly browser window and type just Your-IP into the address line. I used one of my IPs. You should see:

Now add /html to the IP address and press Enter. You should see the Apache2 Default Page. That's because it is still located in the folder under www/html on your server as index.html. Before, we could just put the domain name in an the test page would be served. But we have changed the default up one file level to the www folder. Pretty neat, huh? The following example uses a domain name but it will be the same with an IP.
Substitute Your-Domain name and try it again without the html. I used one of mine in this example:

Try adding /html to the URL. You should see the default page. You may notice a lock icon with a slash through it next to Your-IP or URL. This indicates the page is not secure. It's not an issue right now because we have not finished setting up the security for your web server.
One thing Apache suggests is to remove the Apache generated index page. You can use FileZilla to delete it. I suggest you use FileZilla and save a copy onto your computer. The easiest way to do this is to look on the left side of FileZilla window and click Desktop. Right click and select Create directory and enter it. Make up a name and press Enter. You will be taken inside the new directory. Now look at the right side of FileZilla and open the html folder. Click the index.html file and drag it to the empty left window and release. It should make a copy there. You can now go back to the index.html file on your server and select it. Right-click and select Delete. The file is off the server and you have a copy on your computer desktop in a directory you created with FileZilla.
The Apache2 server installation is now complete. Can you safely use it for web services? Nope. You have to install the support apps needed to make it fully functional. It's time to move on to the next service installation, PHP.
Install PHP_______________________________________________
COMMENTS - Apache Installation
_______________________________________________

_______________________________________________

_______________________________________________
If You Like This:
I may make affiliate fees from services you select on this website.
Thank you!
©1998-2023 RocketRanch